via Crocheting in Georgia
 My good friend John is always finding treasures for me. He knows the Powell River back country better than anyone. I never know what it will be, but here are some of the most memorable treasures he's brought home:
 One treasure came from a "dump" along the shore. The contents probably came from old homesteads. Amid the trash he found a cast iron goose. It had one leg and was rusted, but John knew it was a perfect treasure to bring home for me. Besides, it didn't take much space on his quad.
 And it was a good thing I did. When I moved him, half of the head fell off and by the time I got it to the picnic table, the other half went too. I whittled a stick to fit into the neck and glued the head back together with some Amazing Goop. I also used the Goop to seal the edges of the cast iron halves and sealed the surface with several coats of polyurethane. While I was at it, I made a bark brace for his missing leg. Now Mr. Goose should last for years to come.
 Yesterday you read about how I repurposed a BBQ to become a planter for my cabin porch. Last year I wrote about about repurposing other items in Use It, Don't Lose It. I told about how I used a plastic pancake syrup bottle as a "watering can" for my sprouting seeds. It works really well because you can really control the amount of water by how hard you squeeze.
 But after I made my planter so spiffy, I thought my watering can needed a facelift. I have acrylic paints at the cabin for craft projects, so I used some to paint a new "face" on the bottle. First came a white base coat over the old labels, then a picture on the front. To keep it from getting damaged out in the weather, I sprayed it with several coats of clear polyurethane. Now it is a useful and decorative part of my new planter. -- Margy
 I found a great blog this week. It's called Renewables At Home and focuses on ways to "reduce the impact your lifestyle has on the environment." One article that caught my eye was Two More R's: Refuse and Repurpose. It talks about the importance of finding new purposes for items that are broken or worn out. I did just that with an old BBQ at the cabin.
 I've been wanting a potting stand and planter to put under my kitchen window. I designed one to build from wood, but when our BBQ was damaged during a winter wind storm (see Flipping Burgers), it gave me a new idea. Rather than throw it away, I decided to clean it up to be my "new" planter.

 The back panel proclaiming "Master Chef" became "Master Gardener" with a garden bunny mascot. I wanted plastic trays to fit on the shelf and inside the top to hold my seedlings and plants. I found litter boxes on sale at Canadian Tire for $4 on sale that were the perfect size. That made the total cost of my planter remodel $8.
 The planter looks pretty good. Yes, I know, it still looks a bit like a BBQ, but it makes me feel good to know I gave a new purpose to something that would have otherwise taken up space for years to come in the dump.
 In Spring 2003 when my floating garden was new, Wayne got me a garden mascot - an Easter Bunny. Since then, Bunny has faithfully guarded my flowers and veggies, and brightened my garden in all seasons. By 2008, he lost most of his colour. The sun can be pretty harsh you know. Then, this last winter during a windy storm, he cracked into several pieces. But Wayne and I didn't want to give up on Bunny. Together we brought him back to life.
 Wayne found a cedar shingle in our wood pile. He outlined Bunny and used his new jigsaw to cut out the pattern. Then he used waterproof glue to piece Bunny back together on his new wood backing. You can see how cracked and faded he was.
  Next I used acrylic paints to give Bunny back his colourful countenance. His "backside" is plain white with a puffy cotton tail. His front used the same outlines as before and I just coloured by the numbers so to speak.
 When Bunny was restored front and back, I sealed him with four coats of clear polyurethane. Since he will be standing in the garden fall, winter, spring and summer, I felt he needed a "heavy coat." That will make Bunny ready for anything the weather can dish out.
 Welcome back Bunny! We've missed your smiling face and faithful service. May you stand guard over my garden for many years to come. -- Margy
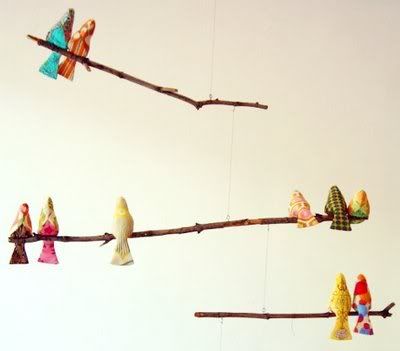 Tutus and Turtles says this bird mobile would really brighten up a corner of a child's room. Read more about the how-to here and here, and get the bird pattern here.
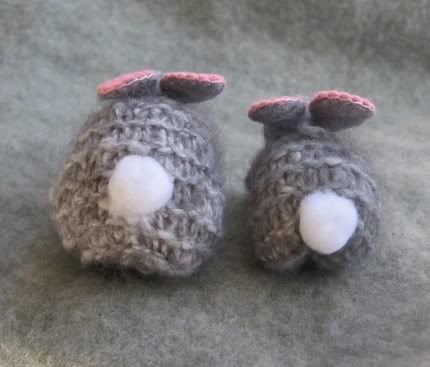 These tiny little bunnies (2.5" and 2.25") are knit from hand spun grey angora yarn so they have real bunny fur but won't hop away!
 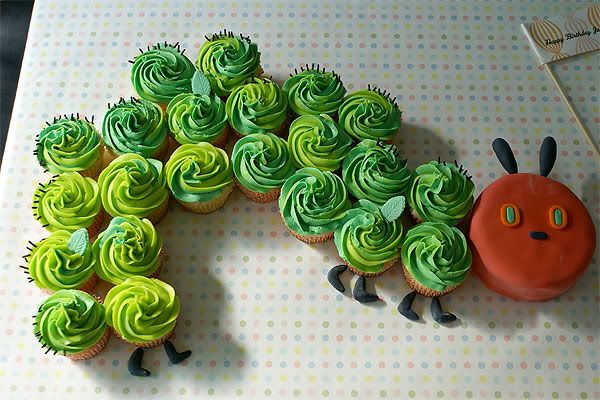 The Very Hungry Caterpillar Cupcake Party Train by Lyndsay of Coco Cake Cupcakes.
 This instructable will walk you through the step by step creation of a Sock Penguin. This project was completed for a Grade 1 (6 year old kids) class that has been studying penguins.